PCB enclosure generator: get a 3D printed case for any board in minutes
Turn a PCB's dimensions, hole pattern and ports into a snap-fit or screwed enclosure you can print tonight. Works for Arduino, ESP32, Raspberry Pi and custom boards.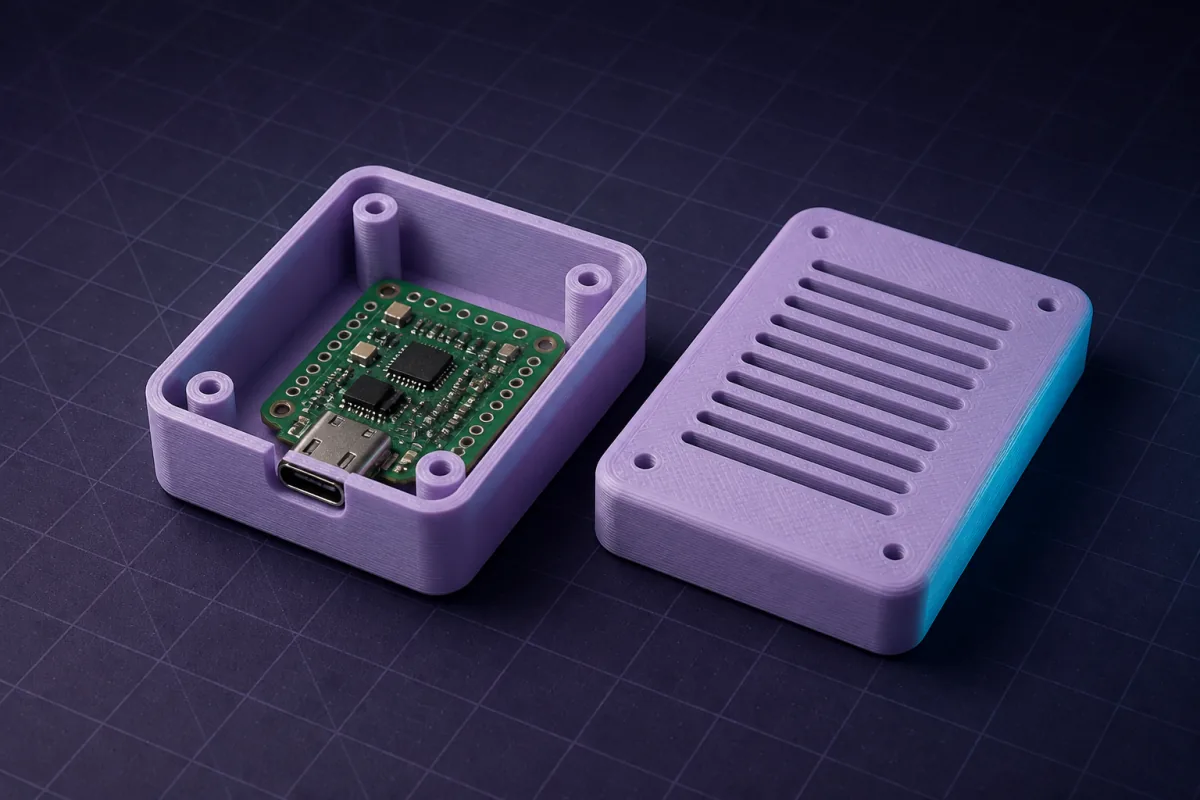
The problem with downloaded cases
Every electronics project ends with a board dangling from a USB cable. You search for a case, find one for a board that is almost yours, print it, and the USB port is 2 mm off. The download was made for someone else's board revision, someone else's sensor, someone else's cable.
A PCB enclosure generator flips this around: you give it your numbers, it gives you a case. Parametric generators on the web have done this for years, but they stop at a rectangle with a lid. The moment you need a slot for a ribbon cable, a window for an OLED, a light pipe for the status LED and a gland for the sensor wire, you are back in a CAD program.
SpeakCAD is an enclosure generator you talk to. You describe the board and the features, the AI writes a parametric model, and your browser renders it: the first version usually within a minute or two, small edits in seconds. Every feature stays editable by chat, so "move the USB cutout 2 mm left" is a message, not a rebuild.
The five numbers every enclosure needs
- Board outline. Length and width in millimetres. Measure with callipers; datasheet values are fine for common boards.
- Mounting holes. Diameter and position from one corner, or the spacing pattern (58 x 49 mm for a Raspberry Pi, 47 x 11.4 mm for a Pico). Boards with no holes get edge rails instead.
- Tallest component. Usually a connector or a capacitor. Internal height is this number plus 1 to 2 mm.
- Ports. Which side, how far from a corner, how far above the board. Note whether the connector overhangs the board edge; USB-B and barrel jacks usually do.
- Anything that must reach the outside. LEDs, buttons, antennas, displays, cable glands, vents.
With those, a prompt like this produces a complete two-part case:
Lid styles and when to use each
| Lid | Best for | What to say |
|---|---|---|
| Snap-fit | Cases opened rarely, no hardware | "snap-fit lid" |
| Screwed | Cases that must stay shut, outdoor use | "lid screwed with M3 into corner pillars" |
| Sliding | Battery compartments, frequent access | "sliding lid in side grooves" |
| Friction | Prototypes, quick opens | "friction lid with a 0.3 mm lip" |
Standoffs versus rails
If the board has mounting holes, ask for standoffs: 3 to 6 mm tall pillars with a pin or an M2.5 hole. If it has none (Blue Pill, most ESP32 dev boards, Teensy), ask for edge rails: two grooves that hold the board by its long edges with 0.4 mm clearance. Rails also let you slide the board in and out for reprogramming.
Features you can add by chat
- Honeycomb or slot vents over a hot regulator or radio module
- A 5.5 mm LED hole or a light pipe channel
- Button holes, with a printed cap if the tactile switch is recessed
- A display window with a 1 mm recess for an acrylic sheet
- A PG7 or PG9 cable gland hole for sensor wiring
- Wall-mount keyholes, DIN-rail clips, a belt loop, a tripod thread
- Embossed or engraved text: the project name, a version number
Each of these is one sentence, added after the base case exists. The AI reports what it assumed (clearance, clip interference, wall thickness) so you can correct it before printing.
Printing an enclosure
Print the base and the lid open side up, no supports. 0.2 mm layers, three perimeters, 15 percent infill. PLA indoors, PETG for anything warm or outdoors. The base gets a 0.5 mm chamfer at the bed edge automatically so the elephant's foot does not stop the lid seating.
After the first print
The first print tells you what you could not measure: a port sits 1 mm high, a clip is tight, a standoff misses a hole by half a millimetre. Say it in the chat with the number, re-download, print again. Re-downloading after a small fix is free in SpeakCAD (the chat request that makes the fix spends 2 credits; typing the number in the viewer is free), which is the whole point of iterating on a case rather than settling for the download that almost fits.
Board-specific guides
We have written up the common boards with their exact dimensions and a working prompt for each: Arduino Uno, Arduino Nano, ESP32 DevKit, ESP8266 and Wemos D1 mini, Raspberry Pi 4 and 5, Pi Zero 2 W, Pi Pico, STM32 Blue Pill and Teensy, XIAO and other tiny boards, plus outdoor sensor boxes and DIN-rail housings. They are linked at the bottom of this page.
Prompts to start from
Open one in the builder, change the numbers to yours, and the model renders in your browser, usually within a minute or two. Keep adjusting in the chat before you print.A two-part enclosure for a 65 x 30 mm PCB with 2.5 mm mounting holes 3 mm from each corner, 12 mm internal height, 2 mm walls, snap-fit lid, USB-C cutout centred on one short side 4 mm above the floor.
A screwed project box for an 80 x 50 mm PCB with four 3.2 mm holes 4 mm from each corner, 20 mm internal height, 2 mm walls, M3 corner pillars, a 12 x 7 mm USB cutout on one short side and 2 x 8 mm vent slots on both long sides.
An enclosure for a 52 x 28 mm dev board without mounting holes: edge rails with 0.4 mm clearance, 1.8 mm walls, 16 mm internal height, a 9 x 4 mm micro USB cutout 3 mm above the floor, sliding lid.
Questions
Yes. The generator works from measurements, not from a catalogue. Give the board's length, width, hole positions, tallest component and port positions, and the case is built to those numbers. Named boards only save you the measuring.
Board outline to 0.5 mm and hole positions to 0.3 mm are enough; the case adds 0.5 to 1 mm of clearance around the board. Port positions matter most. Measure the centre of the connector from a corner and its height above the board with callipers.
Yes. The case is built from solid booleans so the mesh is closed and manifold, both halves rest flat on the bed, walls are at least 1.6 mm and clips are within FDM tolerances. Drop the STL or 3MF in your slicer and print without supports.
Turning the enclosure around in 3D and changing its numbers in the viewer are free. The first version spends 4 credits on a plan, its first 3 small changes free (3 without a plan), and a design change 3, whichever model answers (2 for a small change, 1 for a quick edit that changes a size or a number), and downloading the STL or 3MF is included in every plan. Start with Maker at $7.99/mo (50 credits a month) or Pro at $14.99/mo (200 credits a month); cancel anytime.